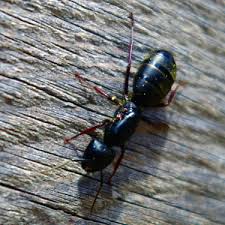
Camponotus Pennsylvanicus

Sample information

Picture
Entry by: Mary Q
Location
Collection date 09/29/2025
Captive / Cultivated? Wild-caught
Group Penn State University
Observations

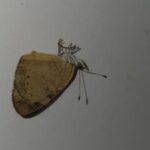
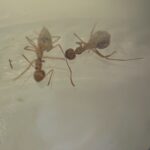
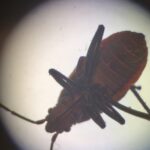
The Camponotus pennsylvanicus specimen was collected at the Penn State Arboretum around 4:45 pm on September 29, 2025. At the time of collection, the weather conditions were partly cloudy with a temperature of 73º, which is pretty consistent with late summer conditions in State College, Pennsylvania. The ant was observed moving through soil and grass in a vast outdoor area with mixed greenery, plants, and flowers. Unlike expected behavior for this species, the ant was not observed interacting with a visible colony or following an ant trail. Instead, it appeared to be isolated. The specimen was notably small compared to typical Camponotus pennsylvanius ants.

The specimen was identified using support from the Seek app, which matched morphological characteristic shared with carpenter ants.

Putative identification Arthropoda

Methods

Extraction kit DNeasy (Qiagen)
DNA extraction location Whole arthropod
Single or Duplex PCR Single Reaction
Gel electrophoresis system MiniPCR
Buffer TBE
DNA stain GelGreen
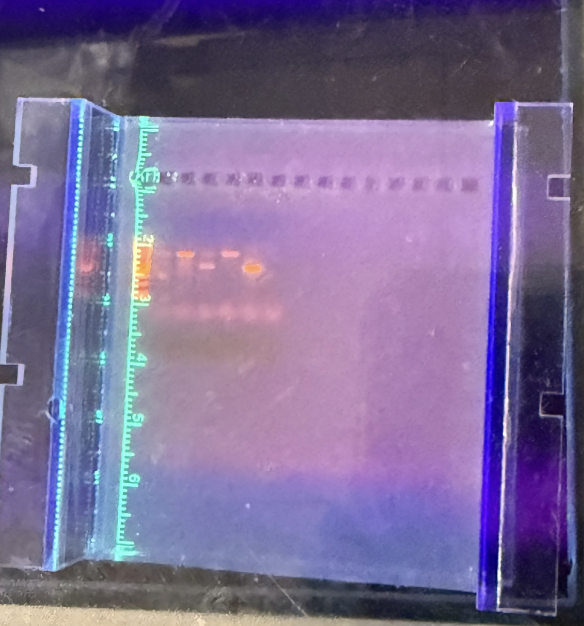
Gel images
Protocol notes

No major issues or errors occurred during DNA extraction, PCR, or gel electrophoresis, and all controls worked as expected, indicating the procedure ran correctly and contamination was unlikely. During the procedures, all controls performed as expected, with the positive control producing both host and Wolbachia bands and the negative control showing no bands. Lanes were identified is assigned order: Lane 1 DNA Ladder; Lanes 2-3 arthropod samples; Lane 4 Wolbachia-positive control; Lane 5 Wolbachia-negative control; Lane 6 positive PCR control; Lane 7 negative PCR control (water).

DNA Extraction

  • Collected arthropod must be rinsed with water, blot dried, and photographed 
  • For small specimens: use the whole body, for large specimens: dissect ~2mm of abdominal tissue 
  • Place each sample into a labeled Eppendorf tube including (+) and (-) controls – Disinfect workspace & wear gloves 
  • Add 180 µL Buffer ATL to each tube & grind tissue with a sterile pestle 
  • Add 20 µL Proteinase K and 200 µL Buffer AL to each tube
  • Vortex from 10 seconds and incubate at 56ºC for 15 minutes 
  • Centrifuge for 30 seconds to pellet debris – Carefully transfer supernatant (DNA-Containing liquid) to new labeled tubes 
  • Add 200 µL ethanol to each new tube and vortex for 10 seconds to precipitate DNA 
  • Label four spin columns and place them inside Flow Through tubes 
  • Pipette each sample into its corresponding Spin Column & centrifuge for 1 minute 
  • Add 500 µL Buffer AW1 to each Spin Column & centrifuge for 1 minute 
  • Discard Flow Through liquid and paper towel into biohazard bag 
  • Add 500 µL Buffer AW2 to each Spin Column & centrifuge for 1 minute 
  • Discard Flow Through Tubes, keep Spin Columns
  1. PCR
  • Label one Eppendorf tube as “PCR Mix” 
  •  Using a new pipette tip for each reagent, add the following to the PCR Mix tube: 
    • 140 µL Taq Master Mix (2X) 
    • 28 µL PCR-grade water 
    • 21 µL each of: 
      • CO1F (arthropod forward primer) 
      • CO1R (arthropod reverse primer) 
      • WSpecF (Wolbachia forward primer) 
      • WSpecR (Wolbachia reverse primer) 
  • Vortex briefly to mix. Quick-spin to collect liquid at the bottom 
  • Label 6 PCR tubes as #1–6 on both lid and side 
  • Add 36 µL of the PCR Mix to each tube using the same tip 
  • Using a new tip for each sample, add 4 µL of DNA to each tube: 
    • Tube 1: Sample #1 
    • Tube 2: Sample #2 
    • Tube 3: Sample #3 
    • Tube 4: Sample #4 
    • Tube 5: Positive control DNA 
    • Tube 6: Negative control (PCR water) 
  • Each tube should now contain 40 µL total – Close lids gently but securely 
  • Spin tubes for 5 seconds in a PCR-compatible centrifuge to collect contents 
  • Place tubes in the thermal cycler and record their positions 
  • TA will start the PCR program (~2 hours)

Gel Electrophoresis

  • Wear gloves and disinfect your workspace and gloves with 70% ethanol 
  • Prepare agarose gel with DNA stain (e.g., GelRed or ethidium bromide) 
  • Set up gel box with buffer and confirm electrodes are correctly oriented (DNA runs from – to +)
  • Label lanes 1–7 on your gel loading sheet: 
    • Lane 1: DNA ladder (5 µL) 
    • Lane 2: Arthropod #1 (10 µL) 
    • Lane 3: Arthropod #2 (10 µL) 
    • Lane 4: Wolbachia-infected arthropod (10 µL) 
    • Lane 5: Wolbachia-uninfected arthropod (10 µL) 
    • Lane 6: Positive PCR control (10 µL) 
    • Lane 7: Negative PCR control (water) (10 µL) 
  • Mix each PCR product with loading dye if not pre-mixed 
  • Carefully pipette each sample into its designated well  
  • Close the lid and connect electrodes (black to – and red to +) 
  • Run gel at ~100 volts for 30–45 minutes until dye front nears the bottom 
  • Use UV light or blue light transilluminator to view bands 
  • Compare sample bands to DNA ladder: 
    • Arthropod DNA = 708 bp 
    • Wolbachia DNA = 438 bp 
    • Primer dimers = <100 bp 
  • Confirm controls: 
    • (+) PCR control should show both bands.
    • (–) PCR control should show no bands. 
    • DNA ladder should show clear size markers.

Results

Wolbachia presence No
Confidence level High
Explanation of confidence level

High confidence level because the controls worked as expected. The positive control showed the Wolbachia band, while the negative control showed no bands. The ant samples also had clear host DNA bands, indicating that the DNA extraction and PCR were successful. Since no Wolbachia band was detected in the ant samples, I am confident that Wolbachia DNA was not detected. However, because the experiment was only performed once, there is still a possibility of human error or other factors affecting the results.

Wolbachia 16S sequence
Arthropod COI sequence
Summary The Arthropoda was found to be negative for Wolbachia.
Report Inappropriate Post