| Protocol notes |
DNA Extraction Protocol
Cell Lysis
- grind sample for 1 minute with sterile microtube pestle
- add 10 μl Proteinase K
- Add 200 μl Tissue Lysis Buffer and immediately mix by vortexing for 10 seconds
- Incubate for 45 minutes @ 56°C, vortexing samples every 5-15 minutes
- Centrifuge the tube 3 minutes at maximum speed to pellet debris
- Carefully transfer the supernatant to a new labeled 1.5 ml microcentrifuge tube. Discard the tube of cellular debris
DNA Binding and Purification
- add 400 μl of gDNA Binding Buffer to the sample and mix thoroughly by vortexing for 5-10 seconds
- Label a spin column fitted with a 2.0 ml collection tube
- Pipette the Binding Buffer/ sample liquid into the spin column without touching the column
- Centrifuge for 3 minutes at 1,000 x g. Keep the tubes in the centrifuge
- Centrifuge for one minute at maximum speed. Transfer the new column to a new column, and transfer spin column to a new collection tube
- Reinsert the spin columns into the collection tubes. Add 500 μl of Wash Buffer and close the cap
- Centrifuge for 1 minute at maximum, and this time discard both the collection tube and flow through liquid
DNA Elution
- Transfer the spin column to a new 1.5 ml centrifuge column tube
- Pippette 200 μl of preheated gDNA (60° C) Elution Buffer to the spin column and close the cap
- Incubate at room temperature for 1 minute
- Centrifuge for 1 minute at maximum speed to elute the DNA into the 1.5 ml tube
- Discard the spin column and keep the labeled 1.5 ml tube (which now contains DNA)
- Store the eluted DNA frozen at -20° C until PCR
PCR protocol
Add template DNA to PCR tubes
- Use a P-2 pipette to add 2μl of template DNA to each corresponding Arthropod PCR tube, changing tips between each
Prepare PCR Cocktail
- use a p-50 or p-200 pipette to add each reagent (Arthropod_F primer, Arthropod_R primer, Water, Taq Master Mix 2X) to the 1.5mL tube marked “A”, changing tips between each
- close tube and briefly vortex for 5 seconds
- microcentrifuge for about 3-5 seconds
Set up PCR reaction
- Use a P-50 or P-200 pipette to add 23μl of the arthropod PCR Cocktail (A) to tubes 1-6, changing tips between each
- tightly secure the lids on each tube
- Change the rotor on the mini-centrifuge to the PCR tube rotor. Balance tubes and briefly spin to collect all the liquid at the bottom
- Transfer tubes to thermal cycler
Storage
- store samples in refrigerator at 4°C
Gel Electrophoresis
- measure 0.3 grams of agarose powder and add it to a 250mL flask
- add 30 mL 1X TAE running buffer to the flask (a 1% solution). Swirl to mix
- Place a ball of Kimwipe tissue in the flask opening to prevent too much steam from escaping, then heat the agarose/ buffer mixture in a microwave until the solution becomes clear. About 25 seconds
- Take the flask out of the microwave and swirl to mix
- Let the solution cool to about 50-55C, swirling the flask occasionally so it cools evenly
- Add 5μl SYBE Safe DNA stain to the agarose/buffer solutions. swirl to mix. Be careful when pipetting the DNA stain
- Set up a gel casting tray and seal the ends with black rubber stoppers
- Select a comb that will accommodate all samples. Place the comb in the gel casting tray
- Slowly pour the cooled, melted agarose solution into the casting try. Gently pop any bubbled with a pipette tip
- Let gel cool undisturbed on a solid, flat surface until it is opaque and solid.
- Carefully pull out the combs and remove the rubber stoppers
- Place the gel in the electrophoresis chamber with the wells oriented near the (-) electrode
- Add enough 1X TAE running buffer so there is 2-3mm of buffer over the gel
Load the Gel
- Pipette 10 μl of the DNA ladder in the first well
- Continue carefully pipetting 10 μl of each sample from PCR into separate wells in the gel. Change tips between each
- Store remaining PCR products in the refrigerator
Run the gel
- place the lid on the gel box, connecting the electrodes appropriately
- Turn on the power supply and set 125 volts for the voltage and 0.2 for the current
- Let the power run until the bottom band in the loading dye is 3/4 down the gel. Turn off the power, disconnect the electrodes, and remove the lid and gel
Obtain an image of the gel
- Using gloves, place the gel on the transilluminator imaging equipment
- Carefully take a photo of the gel with the transilluminator light on
- Note the presence or absence of bands in each lane
For image of gel go to https://wolbachiaprojectdb.org/dbpost/18468
|
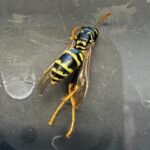 European Wasp
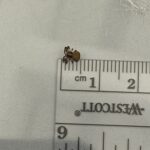
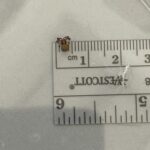
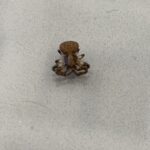
 Small Honey Ant
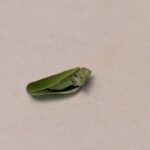 7A
7A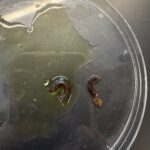 Millipede 7F