| Protocol notes |
Materials:
Incubator, heat block, or water bath at 56 C
Vortex mixer
Mini-centrifuge
Float rack
Metal tongs
2 arthropod specimens
+/- Drosophila controls
Gloves
Tweezers/Scalpel
Petri Dish
Water
Transfer Pipette
4 Microtube pestles
8-1.5 ml tubes
Ojagen DNeasy Kit aliquots
Buffer AtL 91.1 ml)
Proteinase K (120 ul)
Bugger AL (1.2 ml)
Buffer AW1 (2 * 1.5 ml)
Buffer AW2 (2 * 1.5 ml)
Buffer AE (600 ul)
Ethanol (95-100%, 1.2 ml)
4 spin columns
4 collection tubes
P200 and P1000 pipettes
P200 and P1000 tips
Waste cup for tips
Waste cup for liquids
Sharpie
Kimwipes
Tube rack
DNA Extraction:
Label the contents of each 1.5 ml microcentrifuge tube
One tube should be used for positive arthropod control. One tube should be used for a negative arthropod control.
Use tweezers to transfer the first arachnid to a Petri dish. Rinse off with water and use a pipette to remove the excess liquid. Take 2 pictures for the Wolbachia Database.
If the specimen is larger than a grain of rice, remove the abdomen and cut off a small piece about 2mm, small enough to fit in the microcentrifuge tube. If the specimen is smaller than a grain of rice, use the entire body.
Place the specimen in the tube. Label the tube. Repeat for the rest of the arachnids.
Begin preparing Cell Lysis and DNA Precipitation
Add 180 ul Buffer ATL to the first tube
Sterilize a pestle. Grind the sample for 1 minute.
Add 20 ul Proteinase K. It destroys DNases that break down DNA.
Add 200 ul Buffer AL and mix for 10 seconds by swirling the mixture
Re-sterilize the pestle. Repeat steps a-d with all specimens
Incubate for 15 minutes at 56 degrees C. The longer the incubation, the more effective for cellular lysis.
If there is debris present, spin for 30 seconds to remove debris. Otherwise, debris could clog the filter of the spin column. For each sample, use a new tip and transfer the supernatant to a separate 1.5ml tube. Throw away the old tube of debris and repeat for the other samples if needed.
Add 200 ul ethanol (95-100%) to each tube and mix for 10 seconds by swirling the tube. Ethanol precipitates DNA.
Collect four DNeasy spin columns fitted with four 2.0 ml collection tubes. Label the lids of the vortex columns.
Pipet liquid, including the precipitate, from Tube 1 of the above steps into the DNeasy Mini column #1. Using a new pipette tip for each transfer, repeat this process with all other tubes.
Centrifuge for 1 minutes at greater than 6000 * g. The DNA is now caught in the filter of the spin column. Throw away the flow through the 2.0 ml collection tubes.
Place the spin column with DNA from tube 1 in the same emptied 2.0 collection tube.
Repeat for all specimens. Label.
To each specimen, add 500 ul of Buffer AW1 to wash the DNA.
Centrifuge for 1 minute at greater than 6000 * g
Again, remove the flow through waste from the 2.0 ml collection tube. Place the DNeasy Mini Spin Columns back into the emptied 2.0 ml collection tubes.
Add 500 ul Buffer AW2 (a second wash buffer) to each tube and centrifuge for 3 minutes at 20,000 * g.
Place the spin columns into 1.5 ml microcentrifuge tubes. Label each tube. These are the purified DNA samples.
Pipette 100 ul of Buffer AE onto the spin column membrane.
Incubate at room temp for 1 minute.
Centrifuge at greater than 6,000 * g for 1 minute. The eluted DNA will be collected in a 1.5 ml tube.
Remove the spin column and keep the labeled tube. The DNA should be inthe tube.
Incubate the DNA for an hour at 65 degrees celsius at room temperature.
Store the eluted DNA frozen at -20 degrees celsius until PCR.
PCR:
Turn on the thermal cycler and enter the CO1 PCR program. In Cycle 1, run 2 min at 94 degrees Celsius. In 30 Cycles, run 30 sec at 94 degrees celsius, 45 sec at 49 degrees Celsius, 60 sec at 72 degrees celsius. Return to 1 cycle, run for 10 minutes at 72 degrees celsius. Hold at 4 degrees Celsius.
Put on sterile gloves, clean all surfaces with 70% Ethanol. Label a 1.5 mL microcentrifuge tube accordingly.
Collect six 0.2 mL PCR tubes. Label them, place the tubes in a PCR rack and record the identification of each arthropod.
Use a P-20 pipette to add 2ul of template DNA to each corresponding Arthropod PCR tube above. Change tips between each tube.
Set aside the PCR tubes for now. Place the template DNA tubes into storage.
Use a P-200 pipette to the 1.5 mL tube marked A. Change tips between each reagent, then vortex for 5 seconds
Place the A tube on one side of the mini-centrifuge and the B (balancer tube) on the opposite side. Spin about 3-5 seconds.
Use a P-200 pipette to add 23 ul of the Arthropod PCR to tubes. Changes tips between each tube.
Change the rotor of the mini-centrifuge to the PCR tube rotor. Spin to collect all liquid at the bottom of the tubes
Transfer the tubes to the thermal cycler. Once all samples are in the thermocycler, begin PCR.
Once the thermocycler is done, pu store the samples in the refrigerator at 4 degrees Celsius
Gel Electrophoresis:
Note which samples are loaded into which well. There will be two gels run. The first will be running positive/negative Wolbachia. The second will be a CO1 gel to confirm the gels are insects and check for other experimental errors.
Load of each 12μl PCR production into each well. Include positive and negative wolbachia insect controls and DNA positive for wolbachia. Reserve the last lane for the DNA ladder.
Depress the pipette button to the first stop to release the samples into the appropriate wells.
Run the gel at 100V (volts) for 30 minutes.Enter the data into the Wolbachia database.
Samples Used:
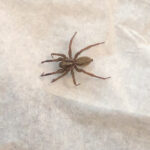
D34: Northern Yellow Sac Spider
F33: Wolf Spider
|

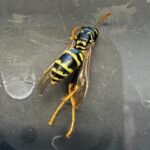 European Wasp
 Small Honey Ant
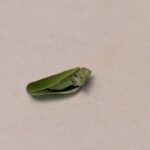 7A
7A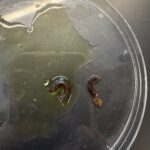 Millipede 7F